
Table of Contents
Top 7


BlackOut® Crossbow Field-Point Target


17"H x 17"W x 13"D.
Wt: 21 lbs.

This is the cabela's outfitter crossbow. Field point target the targets internal. Frame system and multi-layer density design are combined making it able to withstand the damage that field pointed high-speed bolts create multiple bullseye targets displayed on two sides. Extend the targets life cycle 100%. Weatherproof materials resist the elements so you can practice in real world hunting conditions this is cabela's outfitter crossbow. Field point target.
Seems to work like it's advertised Stops arrows very nice and allows to remove easily. Very happy.
Wicked Ridge® Ranger X2 Crossbow Package with ACU-52


Axle-to-Axle: 16" (cocked).
OAL: 33.9".
Power Stroke: 10.875".
Weight: 5.9 lbs.
Package includes: Multi-Line Scope, 3-arrow instant detach quiver, three 18" Ranger Carbon Arrows with practice points, Integrated ACU-52 Self-Retracting Rope-Cocking System.

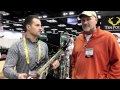
We're back with phil bednar he's director of marketing at 10.40 and. Wicked ridge, and they got a really great youth boat this year the crossbow market. It seems a little remiss and having good crossbows for kids and some kids can't draw a compound early on thirty pounds. 40 pounds is too much and it's not legal in some states so these guys have a new youth model for crossbows the kids can actually use so bill can you tell us about it yeah this is the new ranger crossbow it's in the wicked ridge line it's something that we're really excited about because we've never had a product that can go after the youth market a crossbow is a great tool for a youth, and we haven't been able to really sell a bow that fits the youth perfectly so this the youth like i said it gets kids into the woods sooner than you know you have a seven or eight or nine year old kid that can't maybe that you can't draw that much weight so this is a good alternative getting to get him into the woods absolutely this pose about three years in development we spent three years taking measurements of kids ranging eight fourteen and how they fit hand. Positioning lengths of pool and we came. Up with the ranger it's only 33 inches long it's only about 19 inches wide when it's cocked it's only five point nine pounds we paid special attention to safety on the bow as you can see it's got long wings so your fingers can't migrate into this flight track it's got. A thorough grip keep your hands down. You can buy it in three different packages you can buy it with the accu drop 52 and camo for $4.99 you can buy. It in all black for 399 and you can buy. A lady ranger which is in pink camo for $4.99, so we're really trying to hit all the different kinds of youth but this. Bow here is only 150 pound draw it shoots up to 300 feet a second so it's. Made for a youth but able to be used by an adult and it's short so small kid. Could talk it himself i like the string i think that's going to be popular to children another thing a lot of guys don't know about ten point and the family ten point crossbows is they're finished there is this double-dip devil bit yeah so this is a this is a really good feature if this shows you the quality of the bows where other manufacturers will single dip like ammo dip a bow they doubled it so a goes to the process twice which gives you a really nice finish i mean this is quality throughout all these all the graphics the d everything is just quality it's got the like phil said it's got the long. Finger guard here so little kids typically they could put their hands anywhere on the crossbow and if they got a small finger guard they could get up in the track and get hurt so this is it's kid-friendly and there's a lot of safety features on it too absolutely it's really nice in 399 for black. Mile lets a deal for wicked rich quality we appreciate it absolutely thanks a lot.
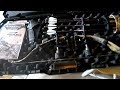
Barnett Crank Cocking Device

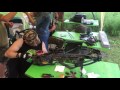
In this section we're going to install the crank cocking device not only is it a great tool it makes drawing the bow a lot easier it's also the most accurate way to draw your crossbow we're going to. Do it in two different methods to either installing it into the stock like we have here on this quad 400 or under the back to stock like we're going to demonstrate on the predator bow we've removed the contents from the box we're going to check the inventory so. Inside your owners manual is a parts list right inside on the second page you want to make sure that you have everything listed here that came in the box if there's anything missing please call barnett we'll ship the parts out immediately this crank cocking device. Also comes with an optional saddle bracket that mounts on top of your cheek piece to install it you will first want to remove the cheek piece from the bow by removing these two screws at that. Point we apply the adhesive strip inside. The beretta mounting bracket put that saddle mount onto the cheek piece after. That you want to reinstall the cheek piece onto the bow and install the screws what that allows us to do is quite the hook assembly by dampening the noise for this optional installation please refer to the owners manual for the step-by-step directions so at this. Point we're going to move the butt plate from the back of the stock, so we can install our bracket but first to do that we need to loosen up these hex head screws. And dial out the butt plate so it can be. Removed easily once we screw that all. The way out we'll start installing the bracket now we can remove the butt plate. As we've dialed it all the way out now. That we have the butt plate removed we're going to install the bracket onto the back of the stock to do that you. Want to line up the holes to where your. Original butt plate was and install these two phillips head screws into the. Redrilled holes now at this point. We've installed the two phillips head screws into the back of the bracket and into the stock now we can reinstall our. Butt plate you want to make sure we have our dial in place inside the back of the stock and then match up the two holes. And then you can turn that in until the. But stock is back in place now we have. Our butt plate dial back into the desired position we need to remember to tighten down the hex head screws so at. This point we've installed our crank cocking device but if you're a lefty you. Can also slide the handle out and. Reverse it to the other side of the crank. Another side note for crank cocking. Device like this one here is that you can actually remove it easily by backing out this hex head screw located at the back of the crank that way you can remove it if you do not want to have it on there while shooting and place it in your pocket in this section we're going to use the crank cocking device that installs inside the. Stock of the bow the first step installing the crank cocking device that mounts inside the stock is remove the two side plates from the rear of the stock so the first step to installing. You crank cocking device is remove the. Handle from your spools and it's just a simple knob backing it out after we do. That we're going to take the hex wrench. And we're going to separate the two spools i like to keep my hand over the spool is to make sure the cables are always lined up so now we can separate. The spools. And make sure they see so those pins go. Inside those holes at this point we can. Reinstall the hex head screw the next. Step to install in the crank cocking device is to separate your side string anchor to do that insert the hex wrench into the anchor. And separate the two pieces so now we. Have our anchor separated i like to put the spindle bracket right onto my optic. And you want to make sure the cables coming off the spool are under your anchor so i install the right side first. With that into place followed by making. Sure the string is under the anchor on. The left-hand side and then i tighten down with a screw now that I'm done. Installing the anchor I'm going to place the finished caps inside those holes. They just press right in the next step. After we install the finish caps is to. Install the catch plate first we need to separate the two pieces by removing the two screws so now we've separated the. Two pieces we're installed the right side of the catch into the stock first once that's. Into position, we install the second piece in the backside making sure the holes line up once the two pieces are in. Place you should see it just like this. At this point we can reinstall our screws. So we finished tighten down the screws in the catch plate we're installed the cover into the slot should look just. Like that after heath row with that we can install our handle making sure the two pins will. Line up with two of the four holes now. That's in place. And now your crank talking device is installed on your bow if you're a left-handed shooter you also have the option of moving the handle to the other side of the bow by just simply unscrewing the knob and screw it into. The other side of the bow so we've. Installed the crank cocking device on this wildcat c5 please refer to your. Owner's manual to make sure that the installations would be exactly the same for instance on this quad 400 we have. The installed crank on instead of going under the string anchor when installing astray needs to go over the string anchor to provide proper clearance.
Excalibur Scope Rings

Gold Tip 20" Swift Bolts with Vanes
Nock end inside dia: .300".
Shaft outside dia: .337".
Length: 20".
Straightness factor: ±.005".
Wt. tolerance: ±2 gr.
Nocks: Moon, Flat.

Rage Simply Lethal 20" Bolt Package with 2-Blade Broadheads

Equipped with 3" X-Vanes and inserts, Rage's Simply Lethal 20" Bolts are ideal for target shooting or big-game hunting.
Wt: 336 gr.
Size: 16.8 gpi.
Length: 20".
Straightness factor: ±.003".
Wt. tolerance: ±4 gr.
Dia: .344".
Rage's Crossbow X Two-Blade Broadheads increase penetration and leave massive blood trails. 2"+ cutting dia. and ultrasharp .035"-thick stainless steel blades are tough enough for the largest big game. Ferrule Alignment Technology ensures proper flight. Shock Collar™ blade-retention system for consistent slip-cam blade deployment.
Cutting dia: 2"+.
Wt: 100 gr.

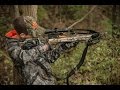
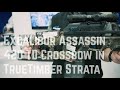
Excalibur Assassin 420 TD Crossbow Package


Speed: 420 fps.
Power stroke: 18.88".
Kinetic energy: 137 ft.-lbs.
Draw wt: 290 lbs.
Length: 33"-36".
Power Stroke: 18.88".
Wt: 8 lbs.
Excalibur Assassin 420 TD Crossbow Package includes: crossbow, TACT-100 illuminated scope, 4-arrow quiver, 4 PROFLIGHT arrows with field points, R.E.D.S. suppressors, fail safe strap.


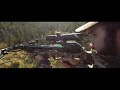
Well i don't want one of these for a. While when we got one. Excalibur assassin to go to the box here. Put it together attachable bowhead gonna. Be using this in june going bear hunting. But let's get it over to the box as he out shoots see over the side. What this comes is your core or possible. Bolt the bow head up just be fitted on. Sol and wear a nice low put my full. Around due date side comes on his own. Level wrench over these guys have to. Place. There we go. Boy ed is all attached nice big stir up. On this extended disturb we're big boot. I like that another thing they haven't. Been put on yet and it comes with their. The pack of string stops will be to see. That okay stick one would you fit in. Behind the strings here I'll have to put. Then on yet also it comes with this. Crank arm and on the bowl it is both. Rated a lot of canadas drank ground gives. In here it's old and just push have to. Get it back off or see any of your left. Hand so there's an ambidextrous bold. Move old cheap dress just taking down. The top when you want also adjustable. Stock so you can move your cheap dress. To where you wanna once you get you. Stock set you just take them back up. Hold it in place. Very nice those are the. Excalibur tactical bow on there or scope. For your caps. Also i know this is a trainer nobody. Able to see this as a little pull before. Your fire also this bowl comes with anti. Dry fire your safety is a big blue. Switch which is nice easy to get at. Awesome. So the so it doesn't slip off your hand. Or arm comes of this wrist piece very. Easy to do up just size it play the. Whole clip it one think it cranks doesn't. Get away from me if it does give this. Peace will catch it stays out of the box. That shoots some quill bolts a little. Shorter than your average bolt and i. Take these field tips off like that's a. 125 because I've got for the bear. Hunting I'm going to use that if we. Brought it and their a hundred 25 green. And i have some 125 green field tips. Around here somewhere also comes with. Your user manual of course some things. In a bag there're some stickers in there. To put on your case. Yeah well no there we go its caliber. Crossbow well now that we've got this. Thing assembled next thing you do is to. Load it up and see what it'll loop over. To the box gonna have to cite it in so. Let's go to the range and do that all right here's a little bar you push. It forwards you release your we love this. Little clicker here to release it and. You push the whole head down and it. Hooks onto the screen as you see down here i pulled it back it's on there. Tight now let's see how hard it is to. Crank this slip my crank on let's start. Cranking very simple to do that. Till the clicks there we are we're in. Police then a little click here click. That off see how that hangs on your. Wrist so it doesn't fall off in the feast and I'm gonna drop it to the ground anything leave it on everybody shoes alongside immediately when i show. You got the trigger here that's gotten angie dry fires no readable firing and no bolt in there, but he's got a. Little bit of trigger relief before he. Hit and then as you pull the fire but as. I said let's get over to the range and. Try this up and see how she does over. The box that was we low with the 125. Green field tip on it but I'll tell you. Another one and do some adjustments, and we get this sighted in right now we're. At about 16 yards there we go i brought. It up of all four clicks up and about two clicks left we're just above the. Orange dot thing is now we're going. To try i have lumenok diablo bolts which are a. Little longer a little heavier than these so I'm gonna try them with the 125. Field tip and see how the site in since. I may be using those on the bear hunt in june and the lumenok on the end so your. Home with luminox you want to make sure you say do with your luminox on because. It all makes the difference. So I'm going to adjust that and see what. We well within the killzone as. Belly as big as a circle on a deer or a. Bear I'm signing in at 16 yards because. Apparently we're going we're going to be. The beta senator to vote between the 10 to 20 yard mark so I'm quite happy with. That i might bring it over one more click just to the rate what we're. Learning I'd like to give up on these bowls is when you press release you push. This down slide it down to hook it onto. The string to drop back make sure you. Push it all the way down just because it clicks doesn't mean it's on there a visual check I'm looking in here to make. Sure that it is the string is hooked onto the trigger mechanism will help. Because there is an ante release clip in. There and as you push it down it will. Click and it may only be hooked on the ante release and if you line it up and. Put all that tension onto the hit release you're gonna have some issues. Getting your string undone but i just. Thought I'd mention that it says rated in the instruction manual to which i. Tend to be a man and read afterwards but. Slide this down make sure it's pushed. All the way on a visual check to make sure you're hooked on to the trigger mechanism you will see it is always a. Good idea now all those do disassembly and packing. Of the bows how they did my instructions i keep them handy so I'll put them. Underneath the foam rubber that's in the. Case as for the bone out make your. Quiver off. And we're gonna take bolt head up keep. Your handy little tool that goes with it. Sir. Loosen your bolt so I'll stand this up. To do the rest. Baby bolton thing just leave that in. Here for now take your bolt head off and. Broke here bow down for packing wait. Crank set that here for a sec in the. Top there's a couple of straps there up. In here the moon is so hopefully you can. See what I'm doing here there's a bolt. Head flat said insole. We'll just eat those velcro straps we'll tie it in now and eat my quiver we'll. Lay it rights up in here just look at the place for it take my bowl in here I'll. Put it with this bulb up wait maybe it. Isn't me you gotta put my bolt down easy. In mice take it up and set it to the. Side if you want it's all full when you hear to hold things in place that will. Leave the crank ready here put it up at. The top over here and of course your. Tool for reassembly put in I'll just. Take her packing slip it back in there. Look at that upside down because this. Was that's better yeah big piece. Close your snaps there's just no factory. Ready to go home team illegal sort of. You on the Excalibur assassin this is. The 360 model last year's model the new. Excalibur assassin apparently does four. A Hundred and twenty feet per second same. Sized bowl everything's the same except for the footage and it also has a quick-release head where you don't have to use the wrench to put it on so i hope. This helped you out maybe decision remember if you're out hunting and you've got a bowl with cams and say you're away on a hunting trip for a couple of weeks and you break a cam or you break a string well your hunts kind. Of done until you can get to a bull press to get that the string replaced or. The cam fix with the Excalibur wolves that's what i like about these recurved you can restring them in the field so as. Long as you carry an extra string whether you your hunt goes on i hope you. Liked today's video if you do please remember like share and subscribe and. Press the bell so you don't miss any notifications.
